How to Import an Email Template into Mailchimp
Reading Time: 3 minutesThis article was last updated on September 1, 2020
Importing email templates into Mailchimp is as easy as pie. Today we will show you what you need to do to in just a few easy steps.
In addition to that, we have made a very simple and easy to follow video tutorial that you can watch.
Basically, there are 3 ways to import you email template into the Mailchimp platform.
- Paste html code
- Import HTML file
- Import zip file
Let’s take a look at the easiest one – import zip file. All you have to do is follow these 5 easy steps:
1. Prepare your files
First things first, you will need to prepare the files you will be importing. After you download a template, the archive needs to contain the following elements:
- HTML file
- Images folder
The name of the zip file doesn’t matter, so you can leave it as it is.

2. Log into Mailchimp
Now that your file is good to go, it’s time to log into Mailchimp with your username and password.

Once you’re logged into your account, click on the Templates section in the upper left corner of the screen.

To create a new one, click on the Create Template button on the right.

This leads you to a page containing the sections – Basic, Themes and Code Your Own.

When you choose Code Your Own, the 3 options to import your email template appear:
- Paste html code
- Import HTML file
- Import zip file
3. Import the zip

Enter your template name and select a zip file to upload.
Make sure to pay attention to the text below:
“Your zip file must be less than 1MB and should contains a single .html file, all your images in web formats (png, gif, jpg) and your CSS file(s).”
4. Customize the template
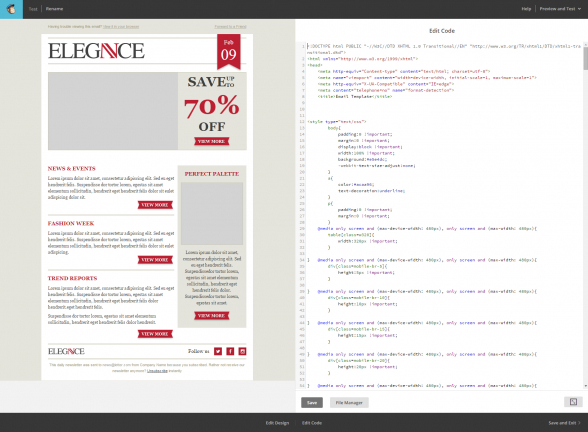
Once you upload the zip, Mailchimp will display two columns – Edit Design and Edit Code.
From Edit Design you can easily edit different elements such as images, text and other.
With Edit Code you can apply some changes to the code the template was built from. After you’re done you can save your progress with Save and Exit.
5. Choose what to do with the template
You’re automatically sent back to the Templates section, displaying your ready to use newsletter.

So now we’re good to go and we can choose what to do with our template:
- Send Campaign
- Preview
- Export
- Share or Replicate
Need assistance with your MailChimp integration? See what MailBakery can do for you.


